▼"Shelf A" and "Shelf B"
■Question
How to use "Shelf A" and "Shelf B"?
◆Answer
By assigning the Stall NPC "Chat" and "Tilia" both on the same island, you can sell up to "20 items" in the Shelf A and B.
*You cannot purchase multiple contracts of the same Stall NPC.
*Stall function is unavailable if "trade"restricted by penalty.
*You cannot sell equipped items, locked items, and "Trade X" items.
- How to Set Advertisement on "Shelf A" and "Shelf B" -
1. Assign "Chat" and "Tilia" on the same island.
2. In the edit screen of Tilia's stall, tap the arrow on "Shelf: A" and change it to "Shelf B".
Then, Chat will manage Shelf A, and Tilia will manage Shelf B.
3. After adding a shelf, you can display items in Shelf A and B from Stall edit screen.
4. To show Shelf A and B on the advertisement, set the island on which Tilia and Chat are assigned as the first island for visitors from "Change Login".
If all steps are completed correctly, after you go back to the main story of Iruna Online, you can sell the items in Shelf A and B up to 20 items.
You can check the items in Shelf A and B in the advertisement.
- How to Check "Shelf A" and "Shelf B" in the Advertisement -
Tap "Check Item(s)" on the island, and an arrow will be shown on the right side of "Shelf A".
When you tap the arrow, the screen will be switched to the item list of "Shelf B".
- How to Sell Items -
1. Set the items, numbers and price for sale, tap "Back" button at the bottom left of the screen and close the Stall screen.
2. Tap "Island Menu" > "Settings" > "Isle Settings", set "Restriction of Invitation", and tap "Update" button.
The stall will open and items will be on sale when you go back to the main story of Iruna Online or visit other player's island.
*We have acquiring and updating your stall advertisement information at regular intervals.
There may be a lag in showing the latest advertisement depending on the time setting.
If the advertisement is not updated on time, please wait a few minutes and check the advertisement again.
▼About Planting System
■Question
What is "Planting"?
◆Answer
You can grow plants in your island and harvest items with Planting System.
- Required Items to Plant -
You need the items below to plant in your island.
- Planter (100 coins)
- Seeds
- Fertilizer
You can purchase "Planter" from the Item Shop.
Also, you can get seeds and fertilizer in the game.
- How to Plant -
1. Prepare Planter
2. Plant Seeds
3. Planting MENU
4. Watering
5. Harvest
6. Harvest List
7. Remove
Step 1. Prepare and Set Planter
Please purchase Planter (100 coins) from the Item Shop.
And set Planter in the island. You can purchase up to 3 Planters.
If you want to plant a new one, select "Empty Planter" and tap "Use".
If you set a planter in use, select the planter with its seed displayed.
Step 2. Select Seeds and Fertilizer
If you haven't planted seeds, you can plant seeds in planters by selecting seeds and fertilizer.
If you have already planted seeds, please proceed to Step 3.
When you tap "Planter" while the target ring is displayed near the planter, the dialogue for planting seeds will be displayed.
Tap "Yes" and the dialogue changes to "Please select a seed." Then, please select the seed and tap "Use".
After selecting the seed, "Please select fertilizer." dialogue will come up.
Select fertilizer from "Meat", "Fish", "Vegetables", "Liquid", "Ore" and "Unknown" list and tap "Use".
Please tap "Yes" if there isn't any problem in confirmation screen.
Then, the seed and fertilizer will be set in the planter.
After you finish planting the seed and fertilizer, tap OK to complete it.
*Both seeds and fertilizer are required for planting.
*You can plant 1 crop per Planter.
Step 3. Planting MENU
If the seed is already planted, tap "Planter" while the target ring is displayed, then "Planting MENU" will show up.
There are "Watering", "Harvest" and "Dispose" in the menu.
Step 4. Watering
Select "Watering" from "Planting MENU" and you can water planters one time per day.
Please water Planter everyday and you can harvest more.
*The date for watering will change at 4:00 pm (PST).
*Even if watered planters are not set, the crops will continue to grow. Please make sure the condition of the planters.
Step 5. Harvest
You can harvest items when the crops grow up at certain level.
Select "Harvest" from "Planting MENU" and you can harvest items from the crops.
The harvested items will put in the harvest list. You can keep up to 30 types of items in the list.
Some crops can be harvested for several times until they are completely withered.
You can plant a new seed after you remove the withered crops, or the crops disappear after harvesting.
*You can harvest items even if there are over 30 types of harvests in the list, but the harvests that surpassed the limit will be thrown away.
When they are going to be thrown away, a warning message will be displayed. Please make space in the list to harvest them.
Step 6. Harvest List
If there are harvests in the harvest list, "There are some harvests!!" will be displayed when you open the menu.
Tap MENU > Settings > Harvest and you can see the harvested items.
Select the items on the harvest list and tap "Get" to move them to the item list.
If you tap "Dispose", the selected items in the harvest list will be thrown away.
*If you already have 50 or more types of items, you cannot get items from the harvest list.
Step 7. Remove
You can remove the crop you've planted from "Remove" in "Planting MENU".
If you want to change the crop, tap "Remove" and plant another seed.
▼About Stall
■Question
How to Sell Items in Stall?
◆Answer
- Assign NPCs to Use Stall -
You need to purchase a "Contract" in the Item Shop to assign a Stall NPC on your island.
Once you purchase a contract, you can use the Stall NPC any number of times.
Please set the NPC on your island as an isle object.
*You cannot purchase multiple contracts of the same character.
- Stall NPCs -
When you tap a Stall NPC while the target ring is shown, the following dialogues will show up.
"Edit Shelf"
"Edit Message"
"Collect"
"Back"
Tap "Edit Shelf" to change the items to sell.
- How to Put Items in Shelf at Stall -
Tap the empty item slot in a Shelf, and tap "Edit" at the bottom right of the screen to show the settings for the item that you want to sell.
Tap "Change Item" or "Select an item" to show your item list. Please select an item from the list.
Tap "Change Price" or "Set a price" to enter the selling price.
*The limit of the selling price is "100 Million Spinas".
Tap "Confirm" and the item will be put in the Shelf.
If you want to sell another item, please repeat the same steps above.
If you want to change the settings of a selling item, please tap the item name and tap "Collect" at the bottom right of the screen to change the settings.
*You cannot sell equipped items, locked items, and "Trade X" items.
*You can sell up to 10 types of items per Shelf.
*If you assign multiple Stall NPCs on your island, you can use multiple Shelves.
- How to Start Selling Items -
If you have finished putting items in Shelf, tap "Back" and close the Stall screen.
Tap Island Menu > Settings > Isle Settings and apply Invitation Mode.
If you go back to the main story of Iruna Online or move to other player's island, Stall will be open.
*We have acquiring and updating your stall advertisement information at regular intervals.
There may be a lag in showing the latest advertisement depending on the time.
If the advertisement is not updated correctly, please check the advertisement after a few minutes.
- How to Collect Spinas -
If your items are sold, you can get Spinas by tapping "Collect" in the Stall screen.
*The limit of the Spinas that Stall can hold is "1 Billion Spinas".
*If your current Spinas and Stall sales reach "2 Billion Spinas" in total, you cannot collect Spinas from Stall.
- How to Cancel Selling Items -
Tap "Edit Shelf" in the Stall screen.
Tap the item you want to cancel selling.
Tap "Collect" at the bottom right of the screen to cancel.
- Message Settings -
You can change the messages that Stall NPCs say.
Choose the situation from "Welcome", "Purchased" or "None Purchased" by tapping the arrows.
Tap the message box and enter the message.
If you finish entering the message, tap "Confirm".
You can enter up to 80 letters.
*The messages will be shared by Stall NPCs.
- How to Buy Items at Stall -
- Purchase Items from Stall NPCs -
Approach a Stall NPC on other player's island and tap the NPC while the target ring is shown.
"Welcome" message will be shown and tap "Next" to show the items in Shelf.
If there are no items you can purchase, "None Purchased" message will be shown and the Stall will be closed.
Tap the item you want to purchase.
Tap "Buy" button on the bottom right of the screen.
- Buying Items -
The item you want to purchase will show up, so tap "+" or "-" and select the number of the item.
Tap "Buy" to complete the purchase.
*You cannot buy items if your bag is full.
- How to Check Stall -
There are two ways to check Stall.
1. General Store in the main story > Tap "Check the classifieds".
2. Tap MENU > Log Out > To Island > Find Stall.
- Stall List -
You can sort the Stalls by newest first.
Also, you can show only "Friend's Stall".
Up to 20 Stalls will be shown in a page.
Tap "Check Item(s)" to check the details of a Stall.
Only the items on the island set as the first island for visitors will be shown.
If there is no Stall NPCs on the first island, "There are no goods." dialogue will show up.
*You can update the list by tapping "Update" button.
*You can show the specified page by "Select Page".
- Stall Details -
Tap "Check Item(s)" to check the details of Stall.
The item names, prices and the number of items will be shown.
Tap "Go to Isle" to move to the island on which the Stall is placed.
*Password Enter Screen will show up if a password is set on the island.
▼Basic System of "Pet"
■Question
Please tell me about "Pet System".
◆Answer
The followings are "Pet System" implemented at the date of May 2nd, 2014.
- About Pet System -
- Stray pets will visit your island.
- You can have up to 3 pets.
- In main Iruna Online, you can use shortcuts for pets:"Summon Pet", "Summon Next Pet" and "Change Pet Tactics".
*The Coin items for pets such as Pet Food, Change Size, Supplements, Cans and Eggs are not implemented.
We will announce in News when they are implemented.
▼How to Change Pet's Name
■Question
How can I change my pet's name?
◆Answer
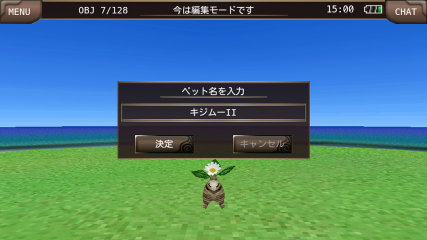
You can change your pet's name in the island with "Rename Card" sold in the Item Shop.
- How to Use "Rename Card"
1. You can receive the item by using it from MENU>Items>Coins in the application. Then, it will move to Collectibles.
2. Enter your island from Log Out > To Island.
3. Login to your island from To Your Island > Edit Mode.
4. Approach and tap the pet when the target ring appeared.
5. And you can change the pet's name from MENU > Change Name by using Rename Card.
▼How to Hatch Pet Eggs
■Question
How to can I hatch pet eggs?
◆Answer
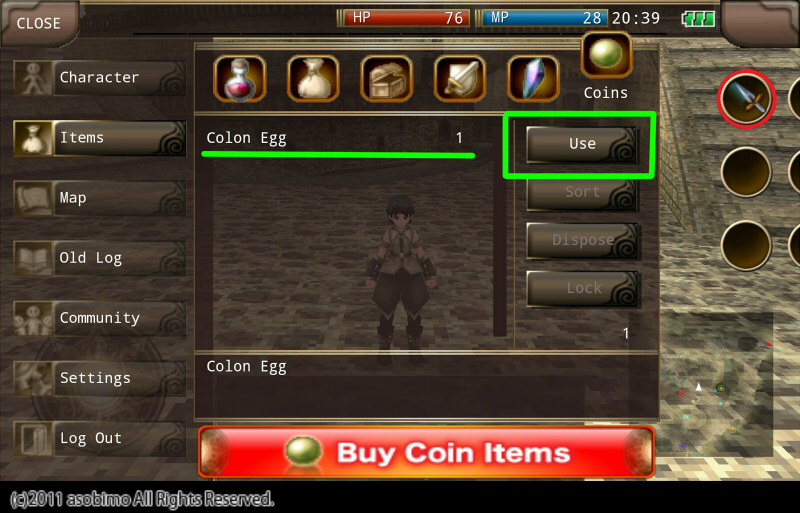
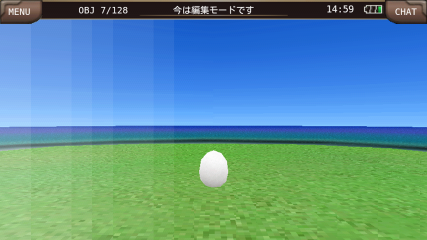
1. The eggs will move to "Collectibles" section by using it from MENU > Items > Coins.
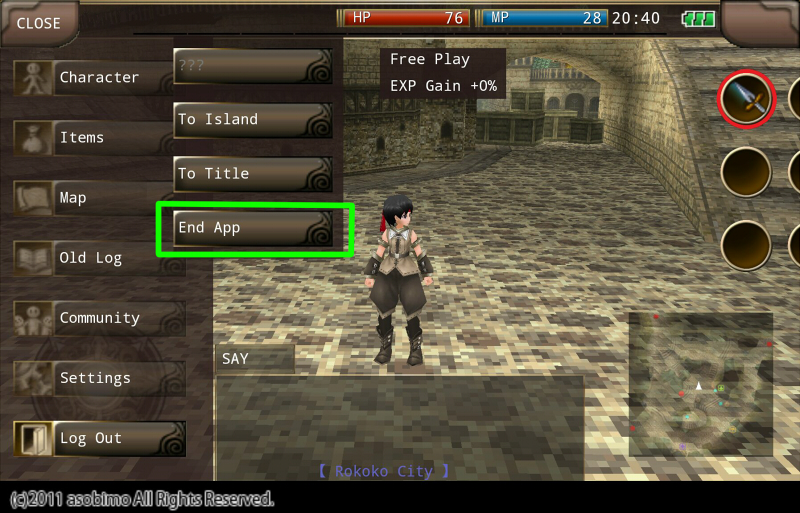
2. Move to the island from MENU > Log Out > To Island.
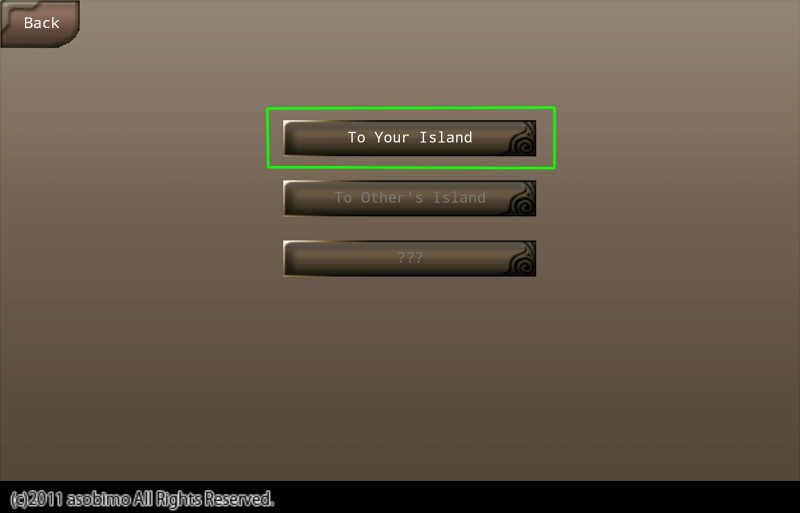
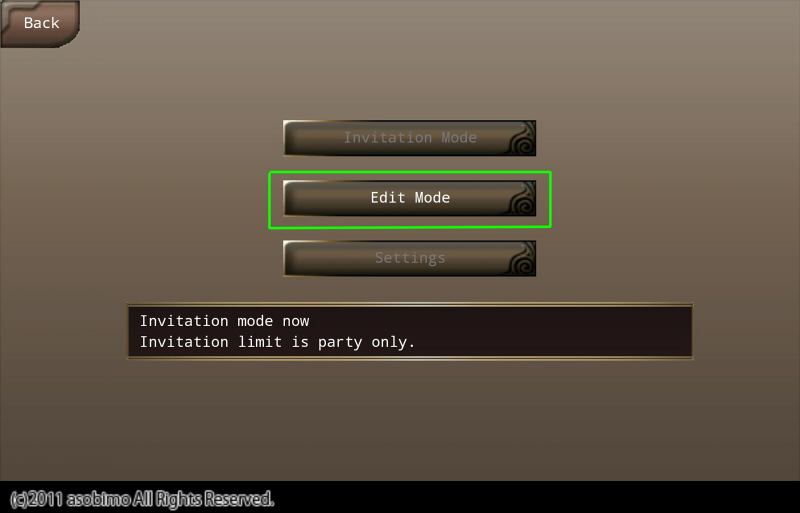
3. Log in the island from To Your Island > Edit Mode.
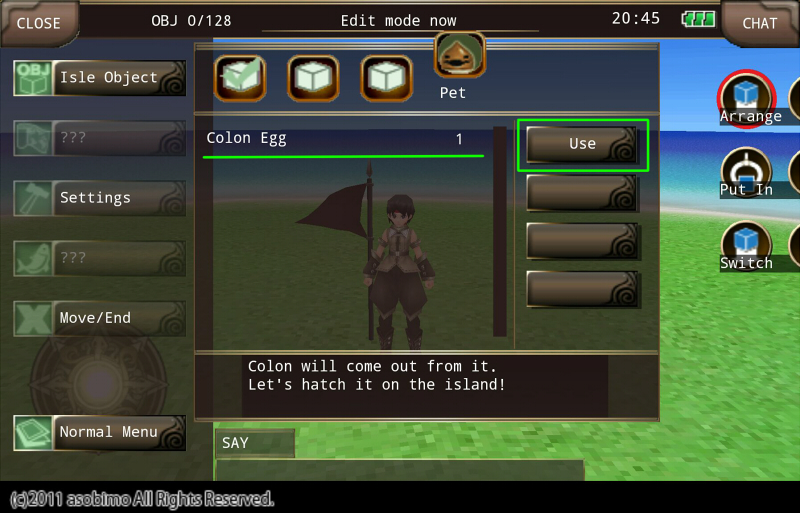
4. The eggs will be hatched by using it from Island Menu > Isle Object > Pet.
*If you have maximum number of pets, you cannot hatch the eggs.
▼How to Set and Confirm "Isle Objects"
■Question
How can I set and confirm "Isle Objects"?
◆Answer
You can set and confirm "Isle Objects" in the following way.
- How to set and confirm "Isle Objects" -
1. Enter your island from MENU > Log Out > To Island > To Your Island > Edit Mode.
2. The island object is in MENU > Isle Object > Undisposed tab in the item list on the right.
3. Select the object and set it with "Put" button.
▼How to Switch Your Island
■Question
How can I switch my island?
◆Answer
If you have multiple islands, you can switch your island to one of them from current island.
"Switching Island", "Initializing Island" and "Switching Login" can be used only from Edit Mode.
- How to Switch Current Island -
The default island is set on Island No.1.
Tap MENU > Move/End > To other island from the upper left of the screen to display island switching screen.
Tap right and left arrows and tap "Set Isle" to show the list of the islands you have.
When you select the island you want to set from the list, the dialogue "Switch [Current Island] to [Selected Island]?" will be displayed.
*Please note that if the island is switched, the island objects in the island will be reset.
- How to Make Second Island -
Tap MENU > Move/End > To other island from the upper left of the screen to display island switching screen.
Tap the right arrow and "Island No.2" with black background will be displayed.
Then, tap "Set Isle" to show the list of the islands you have.
Select the island you want to set from the list, and the dialogue "[Selected Island] will be set to No.2. OK?" will be displayed.
Tap "Yes" to set the island for No.2.
You can set 4 islands at most when you have over 3 types of the islands.
- Moving between Islands -
Tap MENU > Move/End > To other island. And island switching screen will be displayed.
Tap right and left arrows and tap "OK".
Then, the dialogue "Move to ---?" will be displayed, and tap "Yes" to move to the selected island.
When others visit the island, you can move from MENU > Move/End > To other island.
If the settings are changed, you can login to the island other than No.1.
*You can not move from the island using island flags.
- How to Initialize Island -
Tap MENU > Move/End > To other island from the upper left of the screen to display island switching screen.
Select the islands after No.1 using the right and left arrows.
Tap "Initialize" to reset the island.
*If you initialize the island, the island objects will be reset.
*You cannot initialize the island that you are in.
*You cannot initialize Island No.1. Only available to switch by "Set Isle".
- How to Change Login Settings of You and Visitors -
Tap MENU > Move/End > To other island from the upper left of the screen to display island switching screen.
Tap "Change Login" in the island switching screen.
You can change the first island settings that you and visitors enter individually.
Set the first island that you and visitors login and tap "Update".
*If there are no settings, "Island No.1" is set for the first island.
*If you initialize the island that is set for the first island, Island No.1" will be automatically set.
- Note -
- You can not set the island object that you only have one in multiple islands simultaneously.
- Pet will be displayed even if the island owner does not log in. The pet name and menu will not be displayed.
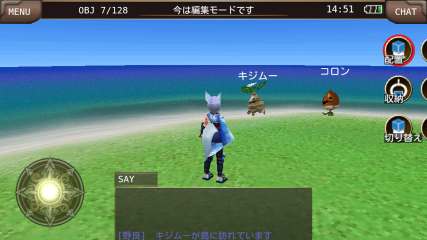
- 1 Stray pet will visit your island at a time according to the element of the island if some conditions are met.
- Stray pets that have affinity value at least 1 will visit all the islands.
▼Isle Points
■Question
What is an Isle Point?
◆Answer
- Isle Points -
You can get "Isle Points" by certain acts in the islands.
Isle Points will be automatically sent to "the owner of the island".
You can check your current isle points from MENU > Isle Points on the upper right of the screen.
"Isle Points" are managed per account.
Therefore, you can collect Isle Points by using other characters in the same account.
When you consume Isle Points, they will be subtracted from the account.
- How to Collect Isle Points -
You can collect Isle Points by the following acts.
- Harvest vegetables or fruits.
- Raise your pets.
- Visit other players' islands.
- Other players visit your islands.
*You cannot get Isle Points by harvesting seeds.
- Notes -
- The limit of the accumulated Isle Points is 10,000 points.
- Isle Points will not be added up if they reach 10.000 points.
- The system to exchange Isle Points with items in Rokoko City has not been implemented.
▼Note for "Stray Pets"
■Question
The stray pet in my island went somewhere. Why?
◆Answer
Stray pets will leave your island following the conditions below.
1. Have stray pets visit your Island meeting the conditions of Island Objects.
2. Feed the pet and raise Affinity to have the pet stay in your Island.
3. Put the Island Objects away before you raise the Affinity and name the pet to make stray pets keep away from your Island. And then, the staying pet will not visit your island.
▼Note for Feeding
■Question
What points should I be careful when I feed pets?
◆Answer
If you raise "Affinity" to 500 by feeding, you can name and keep the pet.
When you feed the pet, please be careful for the followings.
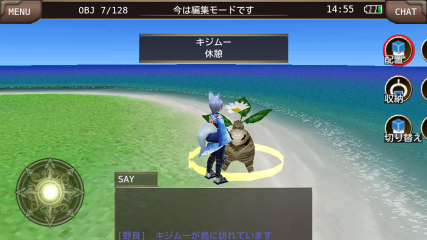
- You can feed stray pets one time per day. The date will be changed at 7:00 am (PST).
- Affinity will raise if you feed the pets.
- If you raise Affinity of the pets, they will visit your Island from next time you login.
- You can get the stray pets as yours if you raise their Affinity.
*The stray pets will NOT become yours only by visiting your Island.
*If you quit naming the pet, you cannot keep the pet until you feed the pet next time.
*If you raise a stray pet's Affinity, other stray pets will never visit your Island.
*You can invite other stray pets by lowering Affinity.
▼Pet Call System
■Question
What is "Pet Call System"?
◆Answer
If you correctly chat your pet's name in "Say" or "Shout" mode, the pet may come to you depending on "Affinity".
*A certain "Affinity" is required to call the pet.
*Your pet may not be able to come to you because of the landform of the island.
For example, the big tree in the center of Spring Island becomes an obstacle.
*Even if the players who are not the owner call the pet, the pet will not come near to them.
▼Pet Size
■Question
How can I change Pet Size?
◆Answer
The size of the pet hatched from the egg depends on feeding and the environment of the island.
▼Pet Skills
■Question
What is a Pet Skill?
◆Answer
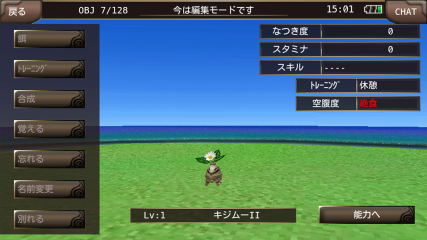
- Pet Skills -
When you raise a pet at a certain level, your pet will randomly learn a skill by feeding.
Pet Skills are categorized as "Extra Skill" and they buff the player in Iruna Online.
- Examples of Pet Skills -
- STR+1
- MaxHP+75
- Melee+10
- Protection
Status boost skills such as "STR+1" will automatically be activated when you login.
Active skills such as "Protection" will be added in "Extra Skill" as shortcuts in the same way as Skill Crysta.
- How to Forget Pet Skills -
A pet can forget a skill by using 500 isle points and selecting "Forget" from pet menu.
You need to meet some conditions and feed the pet to make the pet learn the skill again.
- Notes -
- A pet can learn only one skill.
- If your pets have the same skill, the skill effect will be redundantly activated except active skills.
- The status boost skills will be activated just by accompanying the pet.
- The pet skills are available when you are in a party.
- The pet skills affect only your character, not your pet and other party members.
▼Pet Synthesis
■Question
What is "Pet Synthesis"?
◆Answer
- Pet Synthesis -
You can synthesize "Main Pet" and "Sub Pet", and create an egg.
The pet hatched from the egg will be the same as "Main Pet" in appearance.
*"Pet Synthesis" raises the limit of the pet's stats.
*"Pet Synthesis" itself does NOT raise the stats.
You need 100 Isle Points and 2 Pets of more than Lv9.
Once you synthesize the pets, they will become an egg.
Their growth bonuses will NOT be taken over to the egg.
Please check the growth bonuses of your pets and the number of the pets you have before you synthesize pets.
- How to Synthesize Pets -
1. Approach the pet on the island and tap the target ring.
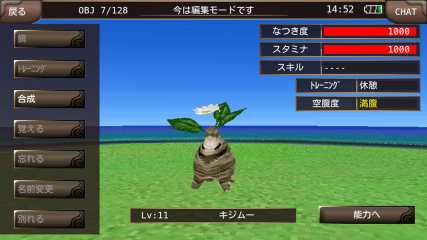
2. Tap "Synthesis" from Pet Menu.
*The pet you select here becomes "Main Pet".
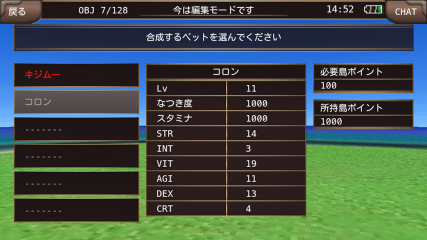
3. Select the pet to synthesize.
*The pet you select here becomes "Sub Pet".
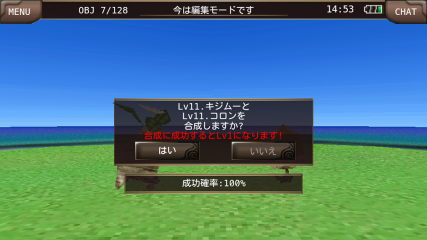
4. Synthesize "Main Pet" and "Sub Pet".
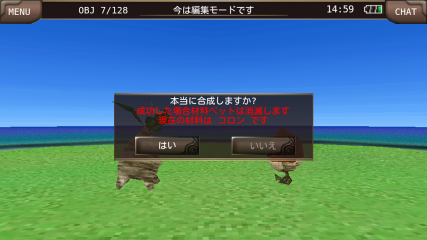
5. When the synthesis succeeds, the synthesized pets will become an egg.
The egg will be hatched at once.

6. Name the pet.
- Note -
- You need 100 Isle Points and 2 Pets of more than Lv9.
- When Pet Synthesis succeeds, "Main Pet" and "Sub Pet" will disappear.
- The pet created by Pet Synthesis will be the same as "Main Pet" in appearance.
- The pet created by Pet Synthesis will be Lv1.
- All the growth bonuses that "main Pet" and "Sub Pet" have will be lost.
- If Main or Sub Pet has a Pet Skill, you can select the skill for the new pet.
- Pet Synthesis may fail.
- If you fail in Pet Synthesis, the stats and affinity of "Sub Pet" will decrease.
▼What is "Island"?
■Question
What is "Island"?
◆Answer
"Island" is a private space where you can go from MENU > Log Out > To Island.
Please arrange "Isle Objects" as you like in your island.
You can set a limitation for the number of players who can enter your island.
Also, you can invite your friends to your island and go to other players' islands.
You can get "Isle Objects" in the game.
They are also sold as coin items.
